OpenAI
GPT-4o, GPT-4o-mini, GPT-4-turbo
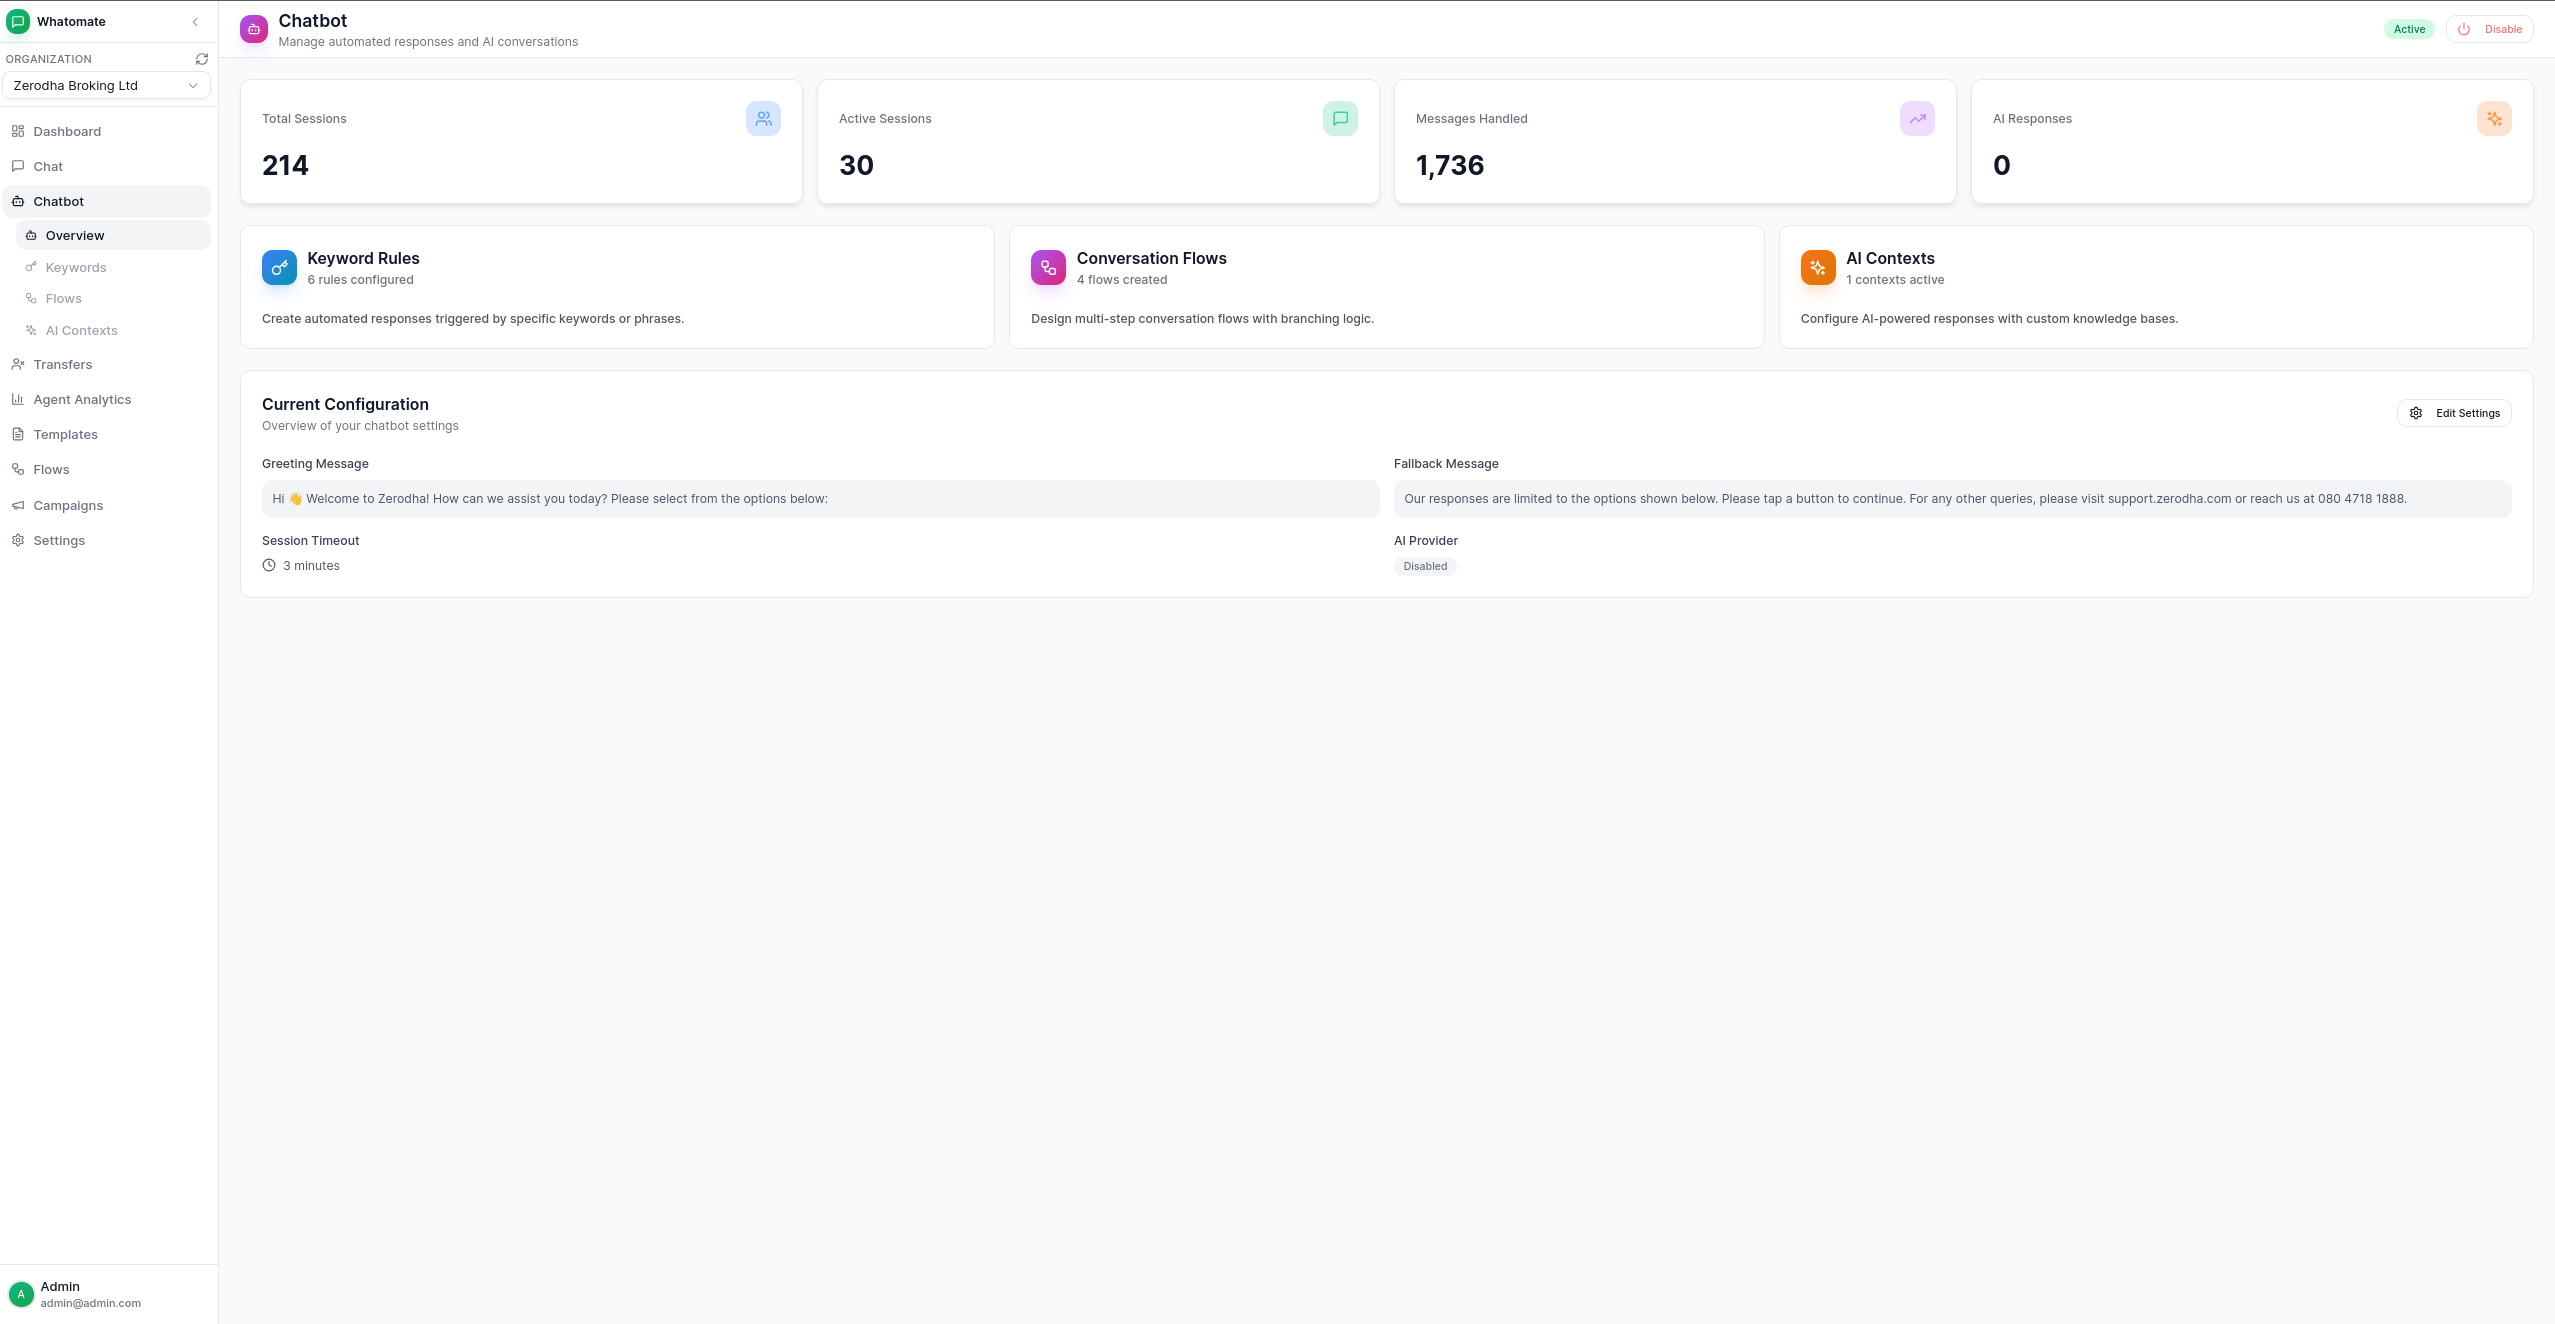
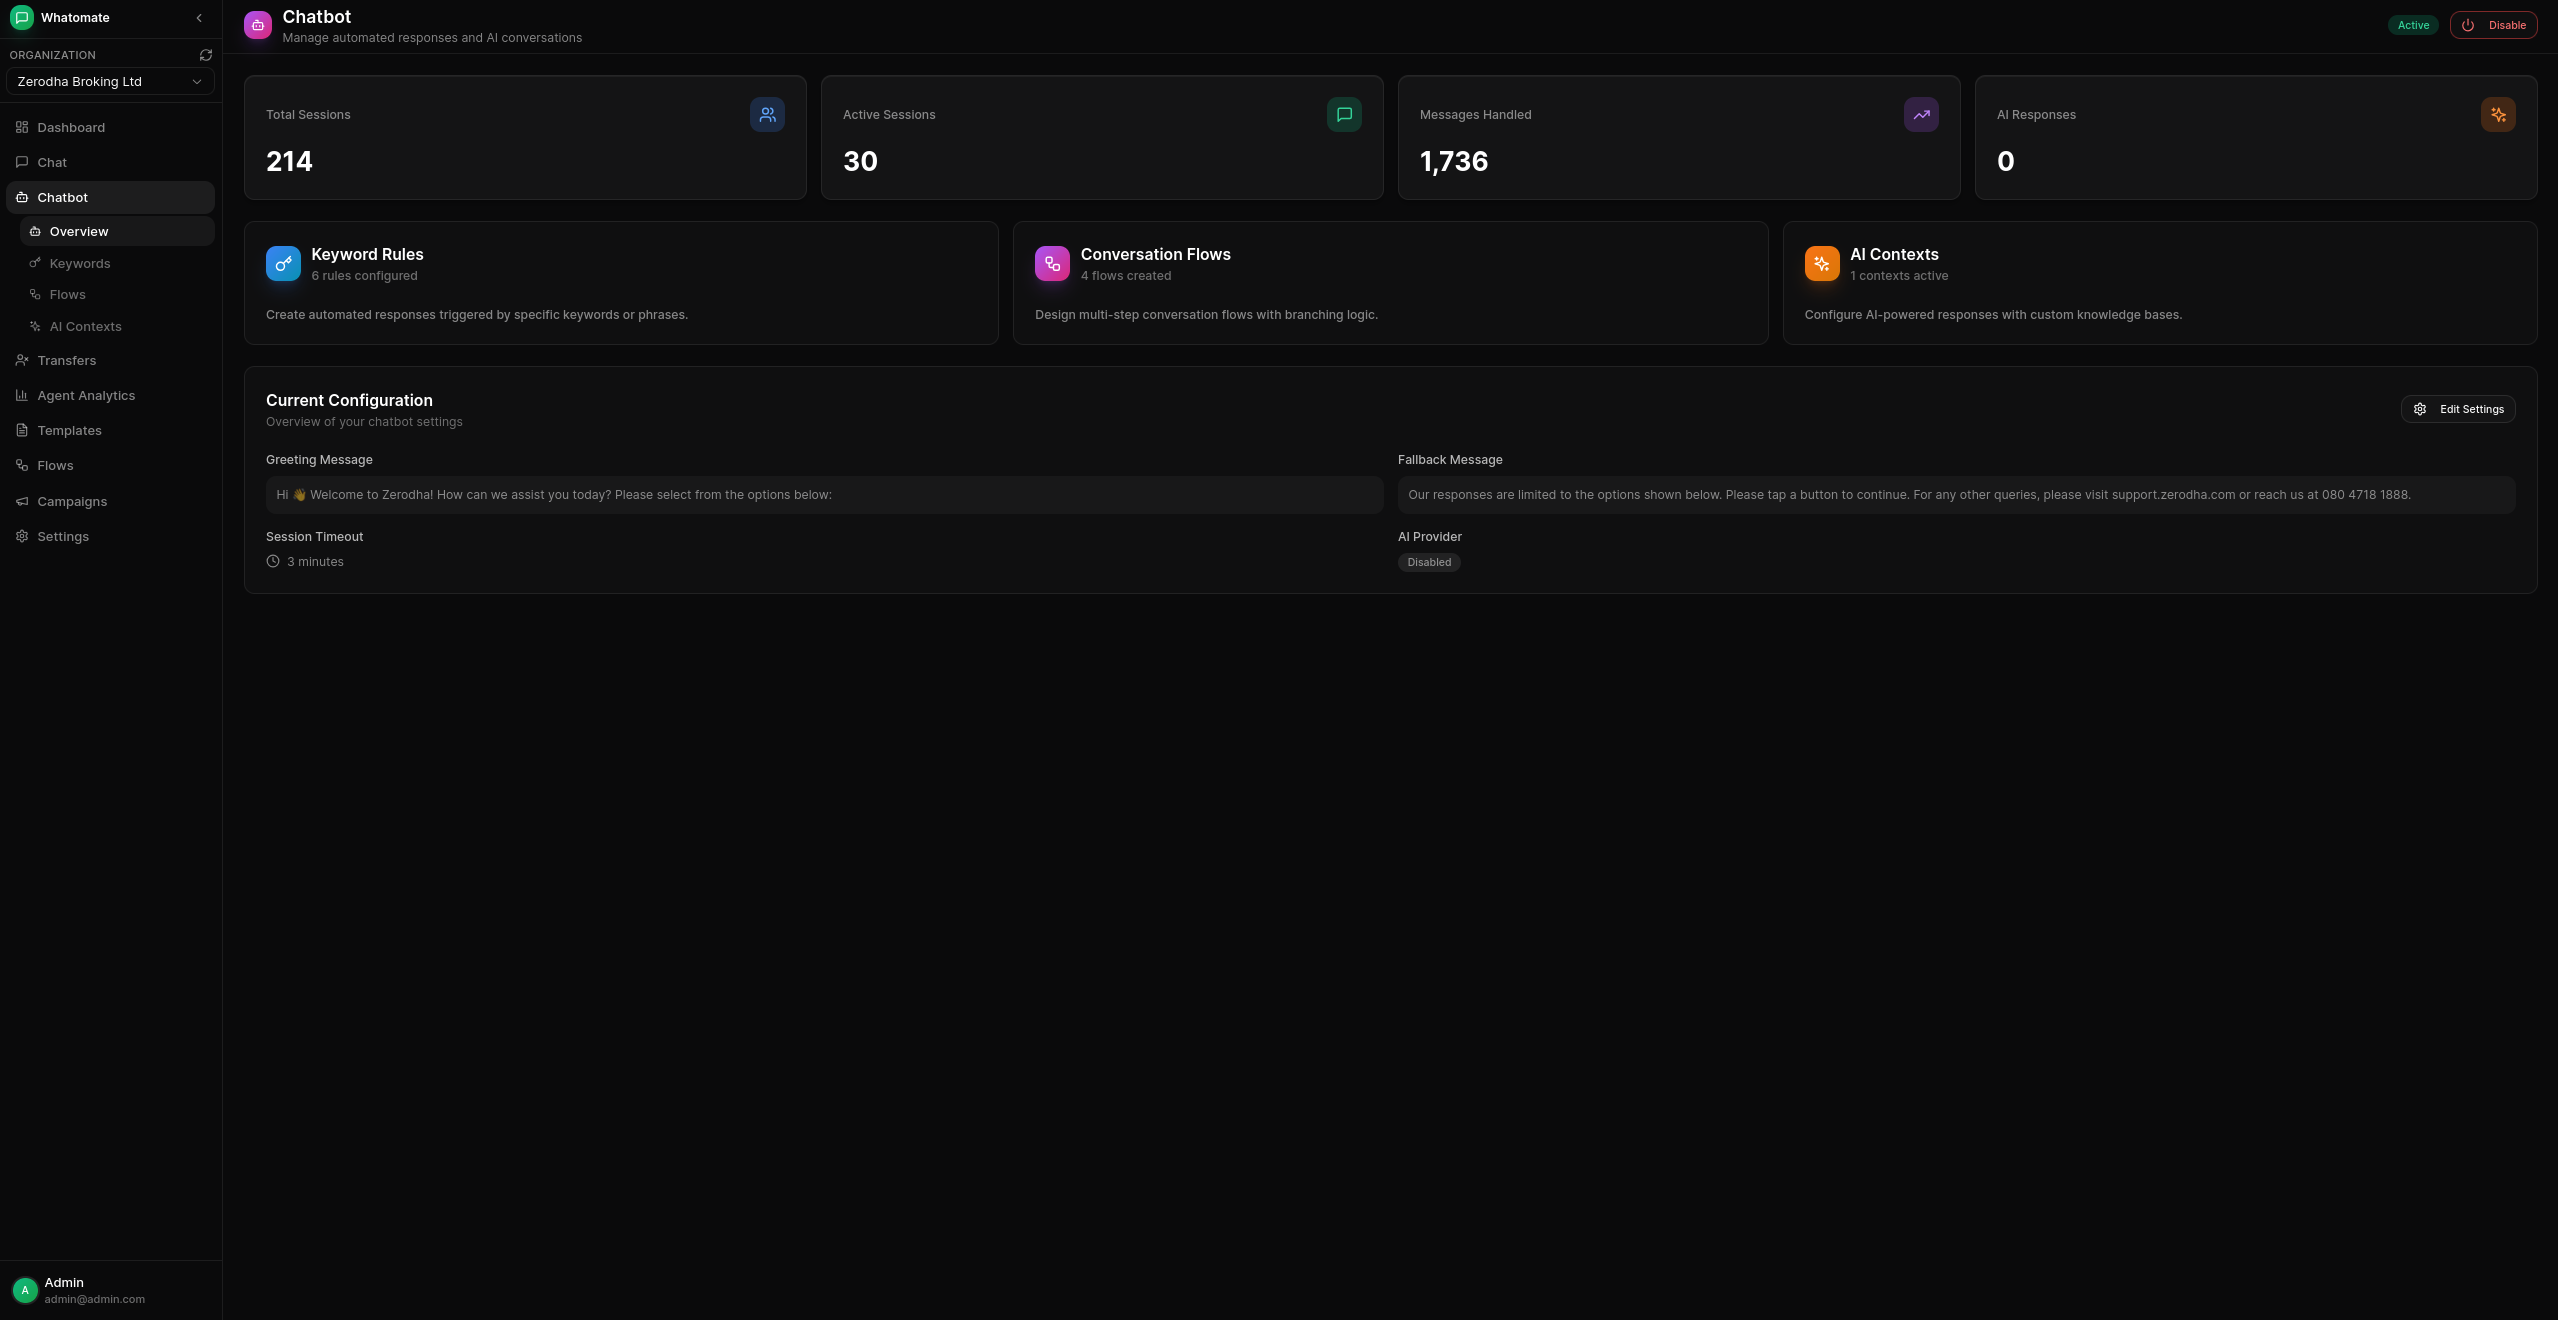
Whatomate’s chatbot automation allows you to create intelligent, automated responses for your WhatsApp messages. From simple keyword-based replies to complex AI-powered conversations, you have full control over how your business responds to customers.
The Chatbot section in the sidebar provides access to all chatbot features:
Configure global chatbot behavior including greeting messages, fallback messages, and session settings.
The greeting message is automatically sent to new contacts when they first message your business (or after the session timeout expires). You can optionally add interactive buttons (up to 10) to guide users to common actions.
When no keyword rules, AI contexts, or conversation flows match an incoming message, the fallback message is sent. Like the greeting message, you can add interactive buttons to help users navigate.
Both greeting and fallback messages support WhatsApp interactive buttons:
Configure how long a session remains active. When a user messages again after the timeout, they receive the greeting message as if starting a new conversation.
Configure when your chatbot is active and how it behaves outside business hours.
Enable Business Hours
Toggle the business hours feature on in the Business Hours tab.
Configure Daily Schedule
For each day of the week:
Out of Hours Message
Configure a message to send when customers contact you outside business hours.
Automated Responses Outside Hours
Choose whether to allow flows, keywords, and AI responses to work 24/7 (enabled by default) or restrict them to business hours only.
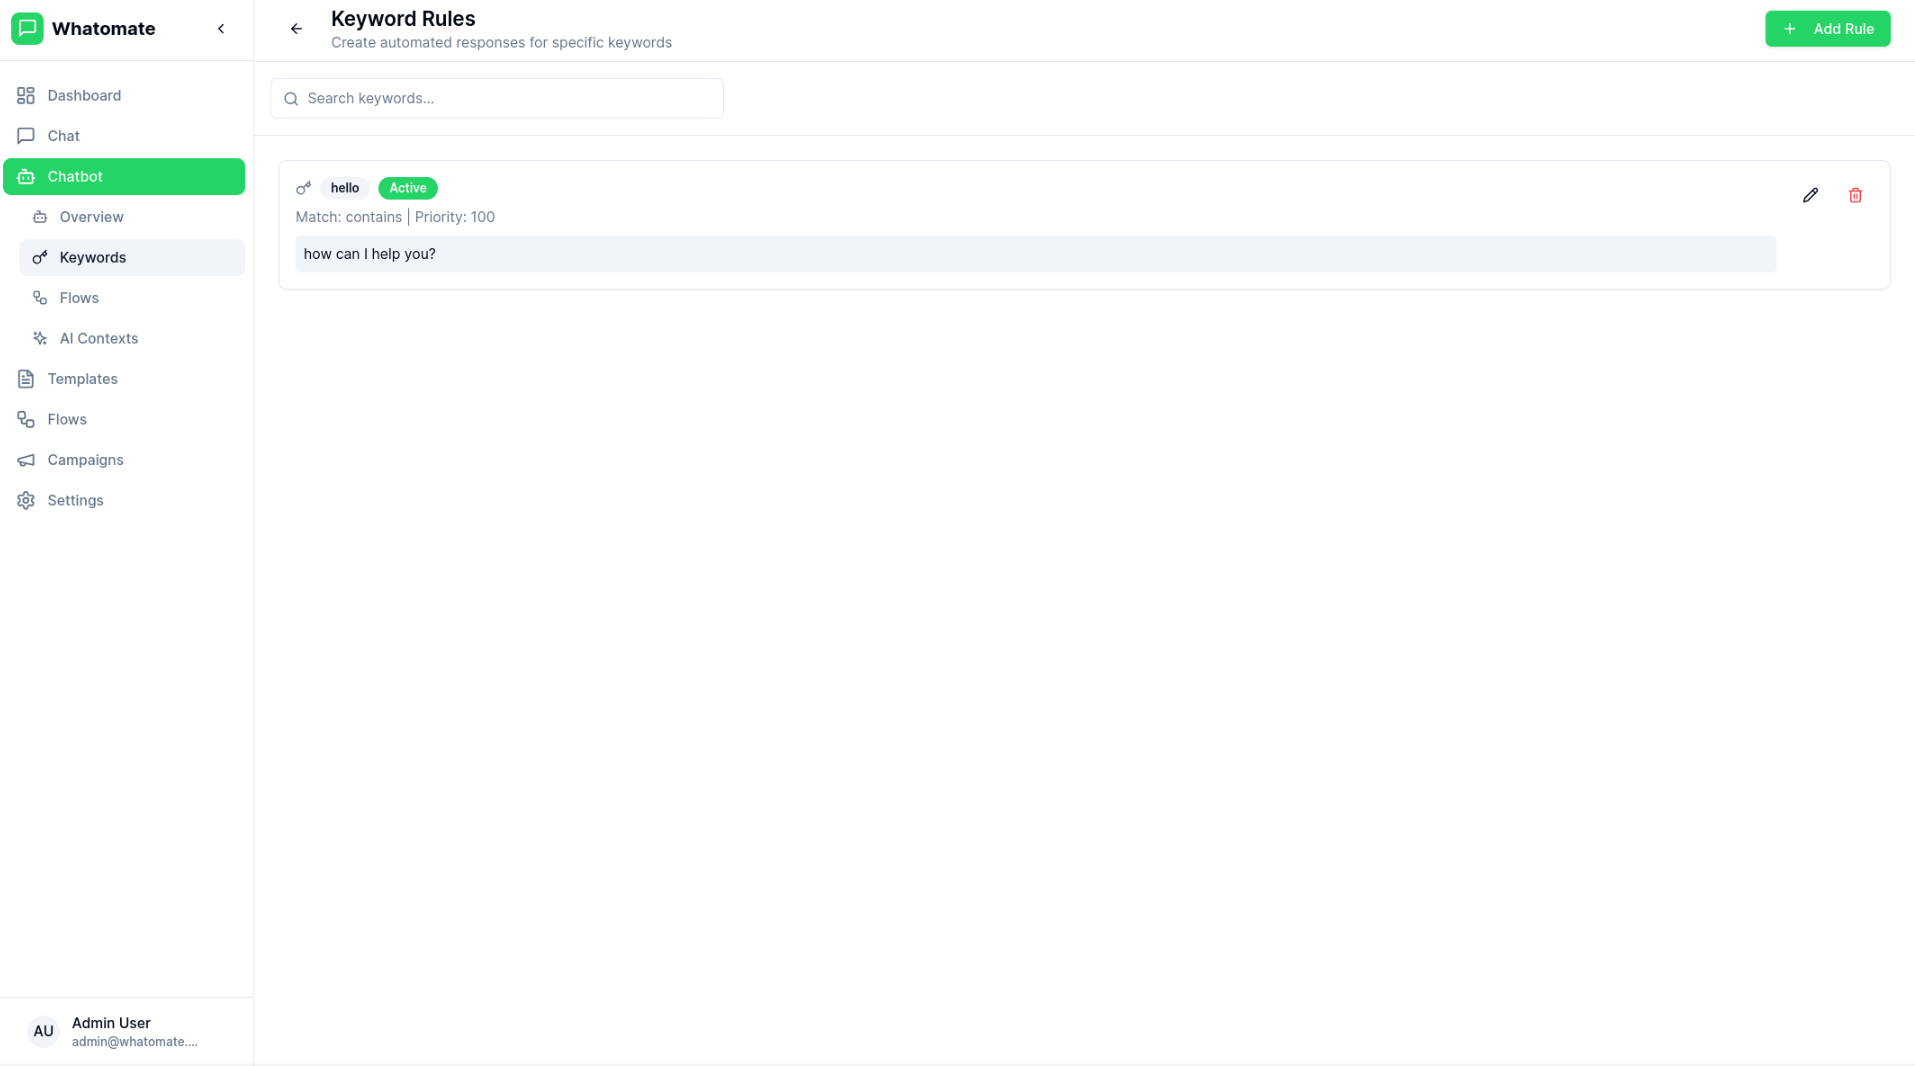
Create automated responses triggered by specific keywords or phrases.
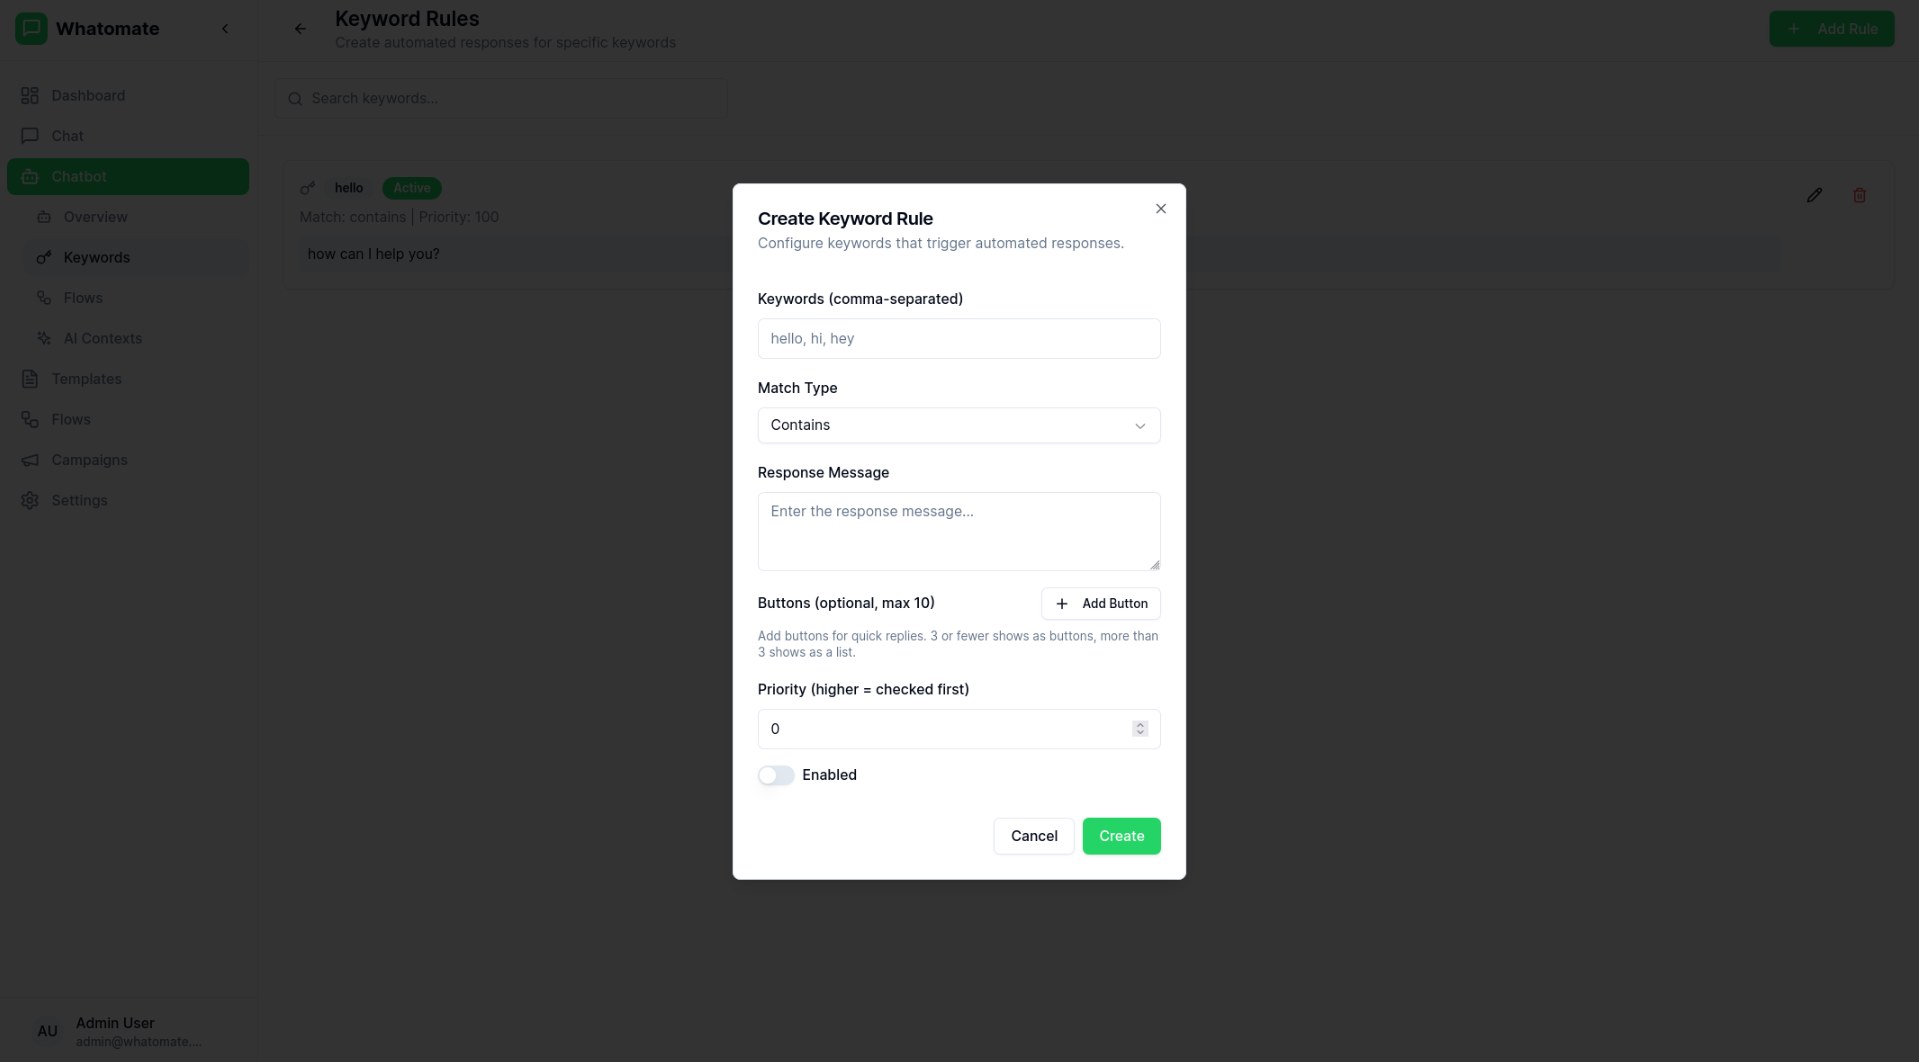
Define Keywords
Add one or more keywords or phrases that will trigger the rule.
Set Match Type
Choose how keywords should be matched:
Configure Response
Set the response type and content:
Set Priority
Assign priority to determine which rule applies when multiple rules match.
Configure AI-powered responses to handle queries that don’t match keywords or flows.
Choose an AI Provider
Select from OpenAI, Anthropic, or Google AI.
Select a Model
Choose the model that best fits your needs and budget.
Configure API Key
Enter your API key from the provider (stored securely and encrypted).
Set System Prompt
Define how the AI should behave and what context it should use for responses.
OpenAI
GPT-4o, GPT-4o-mini, GPT-4-turbo
Anthropic
Claude 3.5 Sonnet, Claude 3.5 Haiku
Google AI
Gemini 2.0 Flash, Gemini 1.5 Flash
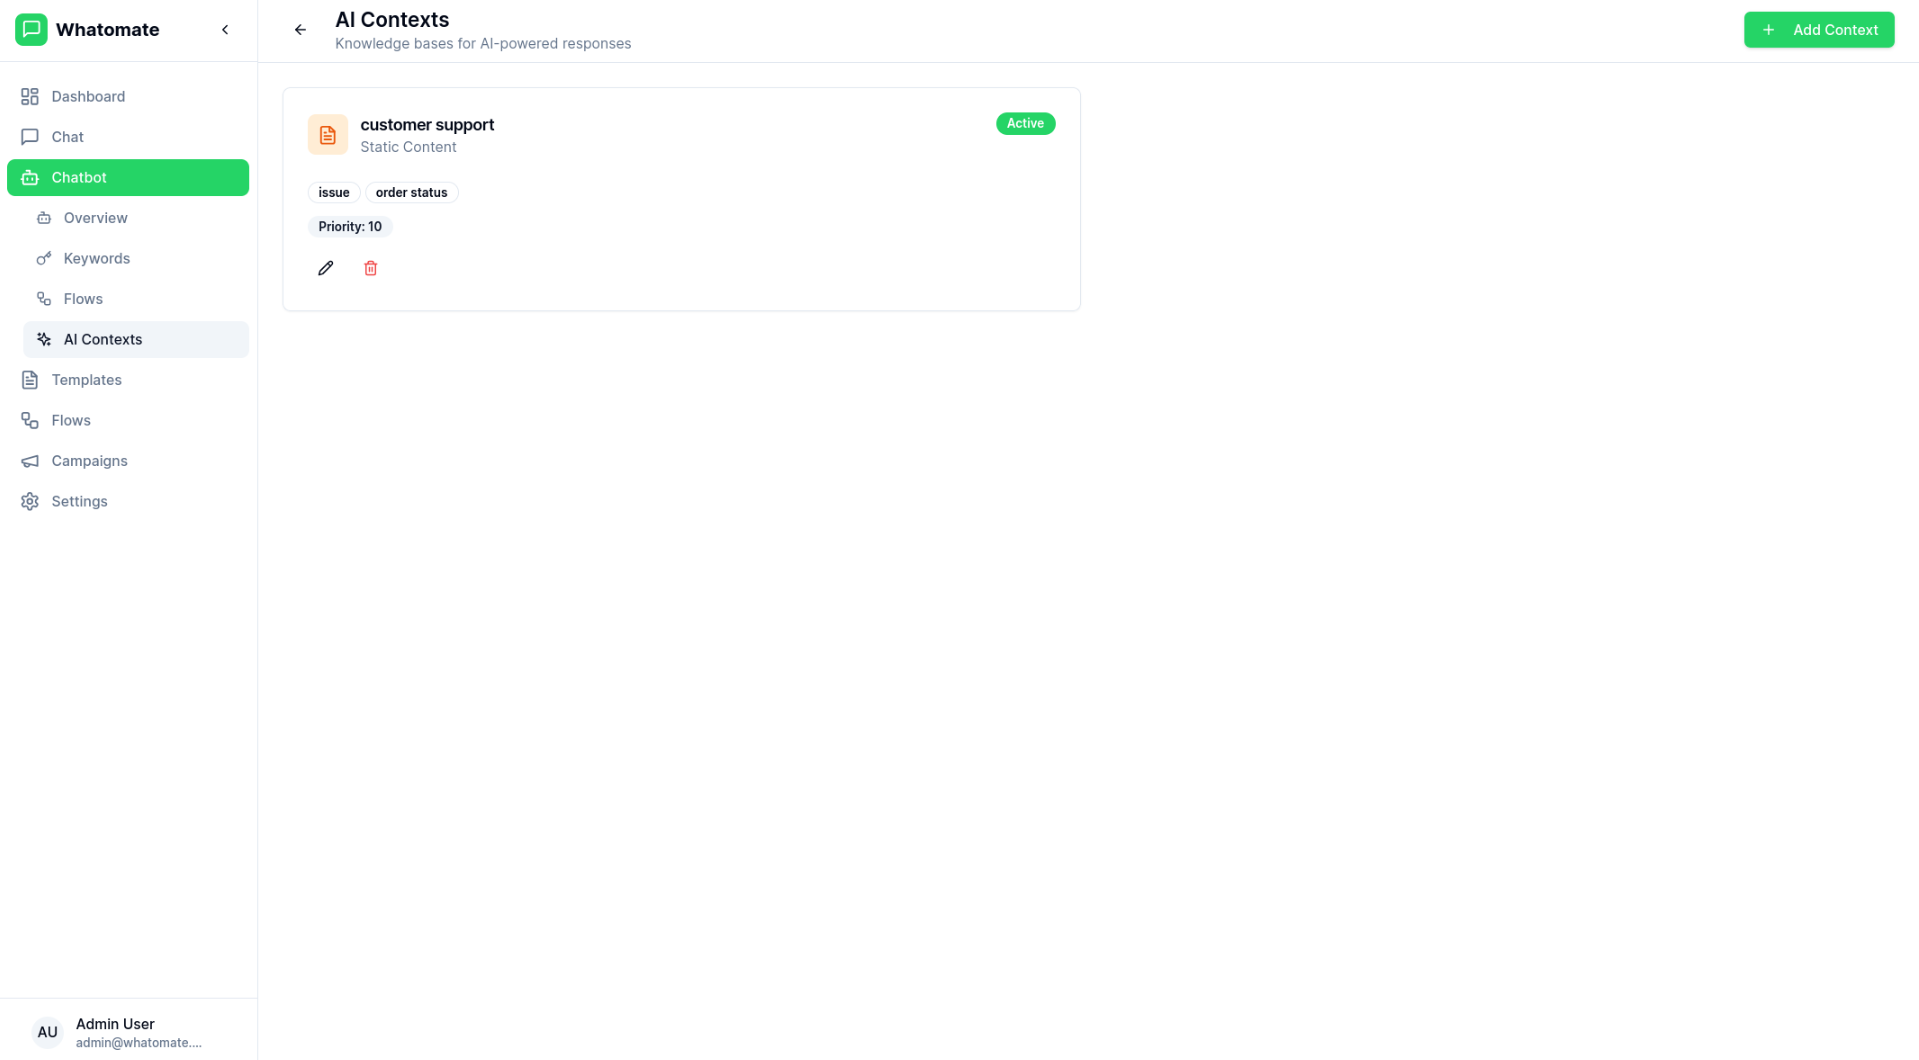
Enhance your chatbot with AI-powered responses using contexts that provide relevant information to the AI.

AI Contexts allow you to:
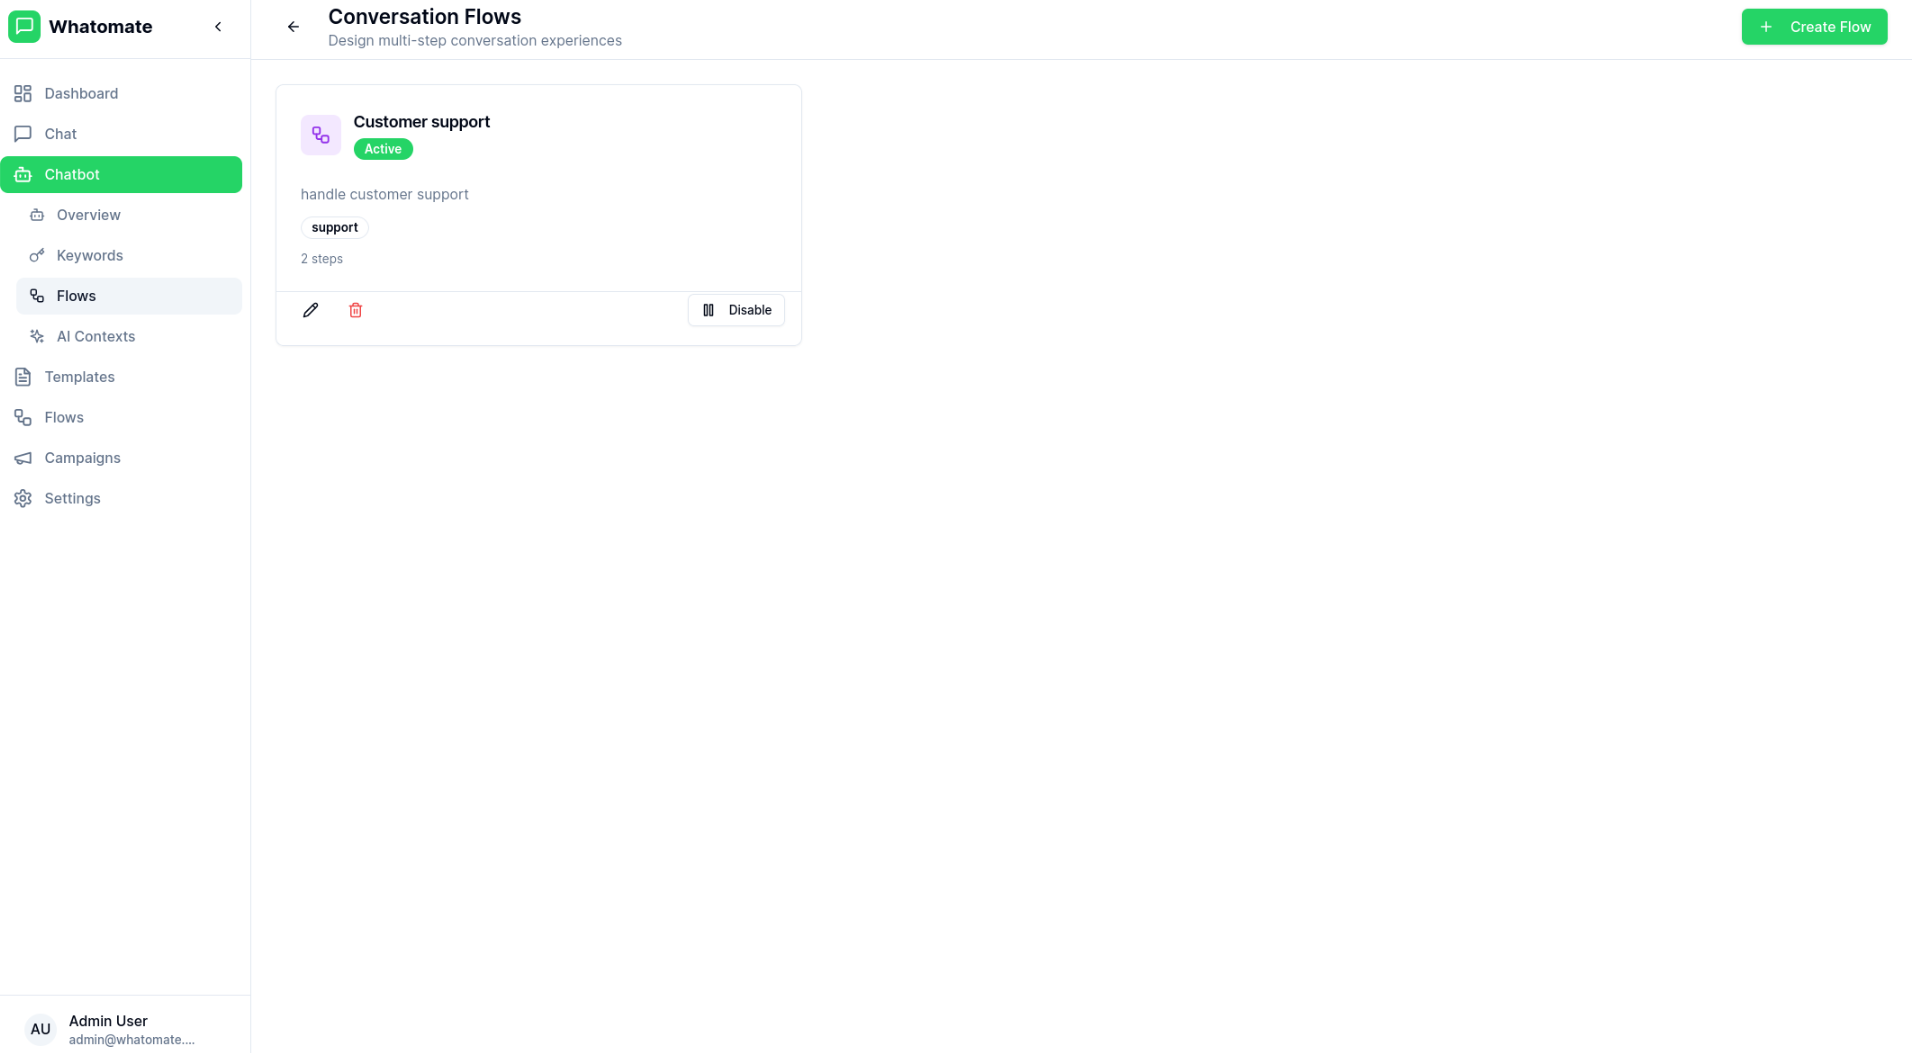
Design multi-step conversation flows with branching logic to guide customers through complex interactions.

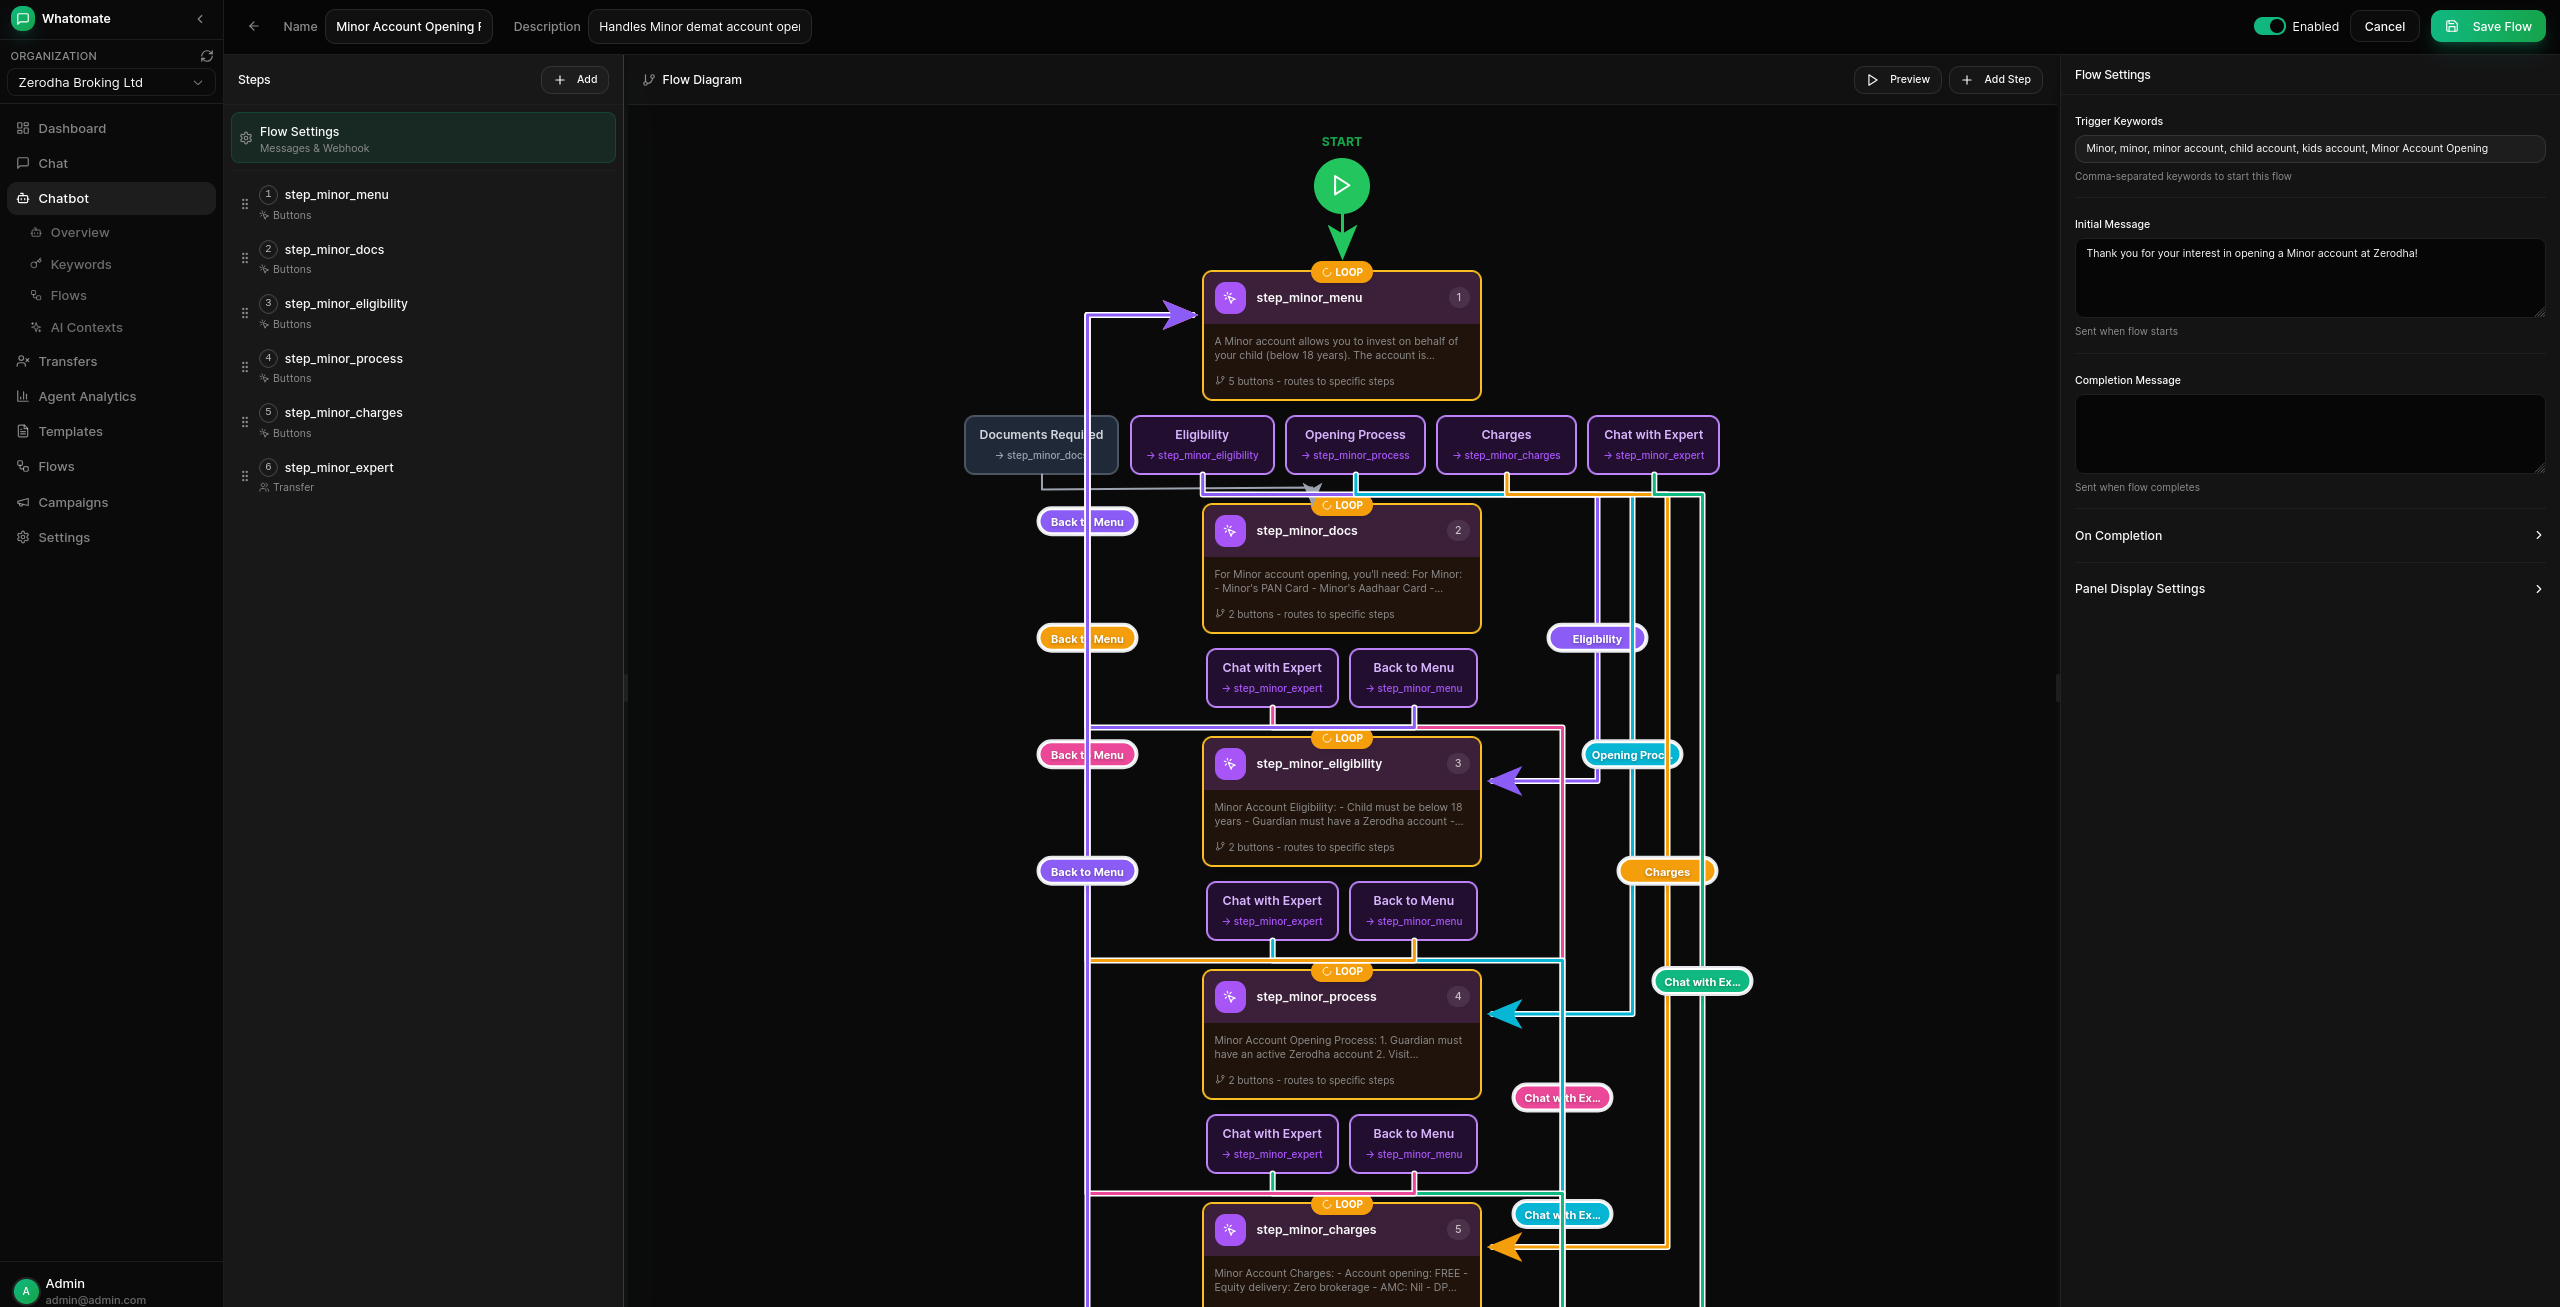
The visual flow builder allows you to:
| Feature | Description |
|---|---|
| Input Validation | Validate user responses with regex patterns |
| Variable Storage | Store user inputs for later use in the conversation |
| Conditional Logic | Branch based on user responses |
| API Integration | Fetch data from external APIs with response mapping |
| Template Engine | Format messages with variables, conditionals, and loops |
| Webhook Headers | Configure custom headers for API calls and completion webhooks |
| Agent Transfer | Transfer to human agent when needed |
| WhatsApp Flows | Integrate native WhatsApp Flows |
| Drag & Drop Ordering | Reorder steps by dragging them to new positions |
The “Fetch from API” step type allows you to call external APIs and use the response data in your messages.
Set API URL and Method
Enter the API endpoint URL and select the HTTP method (GET, POST, PUT, PATCH).
Use {{variable}} syntax to include session data in the URL.
Add Headers (Optional)
Configure custom headers like Authorization tokens or API keys.
Configure Request Body (POST/PUT/PATCH)
Enter JSON body with variables: {"phone": "{{phone_number}}", "name": "{{name}}"}
Set Response Mapping
Map API response fields to session variables for use in templates:
name = data.client.namepositions = data.portfolio.itemstotal_pnl = data.summary.pnlWrite Message Template
Use the template syntax to format the API response data.
The template engine supports variables, conditionals, and loops for dynamic message formatting.
Access session data and API response fields:
{{name}} Simple variable{{user.profile.name}} Nested path{{items[0].name}} Array index accessShow different content based on conditions:
{{if is_premium}} Welcome, premium member!{{else}} Upgrade to premium for more features.{{endif}}Supported operators:
{{if variable}} - Truthy check (non-empty, non-zero){{if amount > 100}} - Greater than{{if amount < 100}} - Less than{{if amount >= 100}} - Greater than or equal{{if amount <= 100}} - Less than or equal{{if status == 'active'}} - String equality{{if status != 'inactive'}} - String inequalityIterate over arrays from API responses:
{{for item in items}}- {{item.name}}: {{item.quantity}} @ ₹{{item.price}}{{endfor}}Hi {{name}}, here are your positions:
{{for pos in positions}}📊 {{pos.symbol}}: {{pos.qty}} @ ₹{{pos.avg_price}}{{if pos.is_loss}} ⚠️ Loss: ₹{{pos.loss}}{{else}} ✅ Profit: ₹{{pos.profit}}{{endif}}{{endfor}}
Total P&L: {{if total_negative}}🔴{{else}}🟢{{endif}} ₹{{total_pnl}}Display collected session data in a side panel when viewing a contact in the chat view. This allows agents to see customer information collected during chatbot flows at a glance.
Data is collected from two sources:
Store as option in flow stepsResponse Mapping in API fetch stepsAll collected data is stored in the session and can be configured to display in the Contact Info Panel.
In the Flow Builder, scroll down to the Panel Display Settings section:
View Available Variables
The panel shows all variables collected in the flow:
Store as fields in input stepsResponse Mapping in API fetch stepsAdd Sections
Click “Add Section” to create display sections. Each section can have:
Add Fields to Sections
For each section, add fields from the available variables:
Reorder Sections and Fields
Drag sections and fields to reorder them as needed.
Choose how each field value is displayed:
| Type | Description | Best For |
|---|---|---|
| Text | Plain text (default) | Names, descriptions, long values |
| Badge | Rounded pill shape | Status values, categories |
| Tag | Rectangular label | IDs, codes, short labels |
For Badge and Tag display types, choose a color:
| Color | Description | Use Case |
|---|---|---|
| Default | Muted gray | Neutral information |
| Success | Green | Positive status (completed, active, approved) |
| Warning | Yellow | Attention needed (pending, processing) |
| Error | Red | Negative status (failed, cancelled, rejected) |
| Info | Blue | Informational (new, updated) |
| Feature | Description |
|---|---|
| Resizable | Drag the left edge to resize the panel width |
| Auto-Open | Panel automatically opens when viewing contacts with configured data |
| Collapsible Sections | Expand/collapse sections to focus on relevant information |
| Multi-Column Layout | Display fields in 1 or 2 columns per section |
| Display Types | Show values as text, badges, or tags with color coding |
For a customer support flow that collects name, email, and order details:
Section 1: Customer Info (1 column)
customer_name → “Name” (Text)customer_email → “Email” (Text)Section 2: Order Details (2 columns, collapsible)
order_id → “Order ID” (Tag, Info)order_status → “Status” (Badge, Success/Warning/Error based on value)order_date → “Date” (Text)order_total → “Total” (Text)Hand off conversations from the chatbot to human agents when needed.
When a conversation is transferred:
Transfers can be initiated in three ways:
Manual Transfer
Agents/managers can click “Transfer to Agent” from the chat view to manually transfer a conversation.
Conversation Flow
Add a transfer step in your conversation flow to hand off to agents at specific points.
Keyword Rule
Configure keywords like “talk to agent” or “human” to automatically trigger a transfer.
Teams allow you to organize agents into groups that handle specific types of inquiries (e.g., Sales, Support, Orders). Each team can have its own assignment strategy and queue.
Navigate to Settings > Teams to manage teams:
Create Team
Click “Create Team” and provide a name and optional description.
Choose Assignment Strategy
Select how transfers should be assigned to team members:
Add Members
Click “Manage Members” to add agents to the team. Each member can be assigned a role:
Use the Transfer to Agent/Team step type in conversation flows to route chats to specific teams:
Add Transfer Step
In the flow builder, add a new step and select “Transfer to Agent/Team” as the message type.
Configure Transfer
{{order_id}})Test the Flow
The transfer step will end the flow and create a transfer to the selected team.
Agents see the Transfers view in their sidebar with:
Admins and managers have full visibility into the queue and can:
Configure queue behavior in Chatbot > Settings:
Allow Agents to Pick from Queue - When enabled, agents can self-assign transfers by clicking “Pick Next”. When disabled, only admins/managers can assign transfers.
Assign to Same Agent - When enabled, transfers are automatically assigned to the contact’s existing agent. When disabled, all transfers go to the queue regardless of previous assignments.
Transfer Created
A transfer is created via manual action, flow step, or keyword rule. The contact is assigned to a team queue, general queue, or an existing agent.
Team Assignment
Based on the team’s assignment strategy:
Agent Handling
The agent communicates with the customer. The chatbot is paused for this contact.
Resume Chatbot
When the conversation is complete, the agent clicks the “Resume Chatbot” button (play icon) in the chat header to return the contact to chatbot processing.
When viewing a contact with an active transfer:
If a contact already has an assigned agent (from a previous conversation), new transfers for that contact are automatically assigned to the same agent.